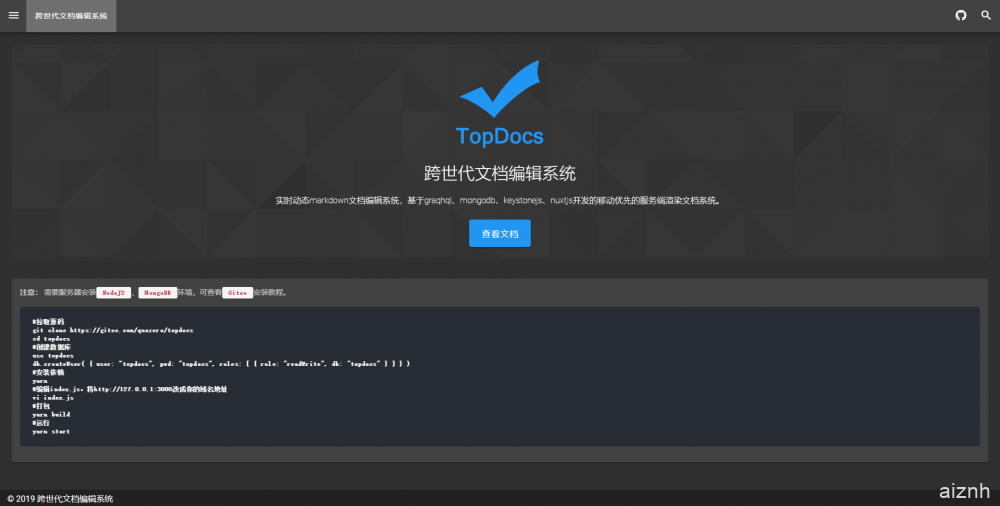
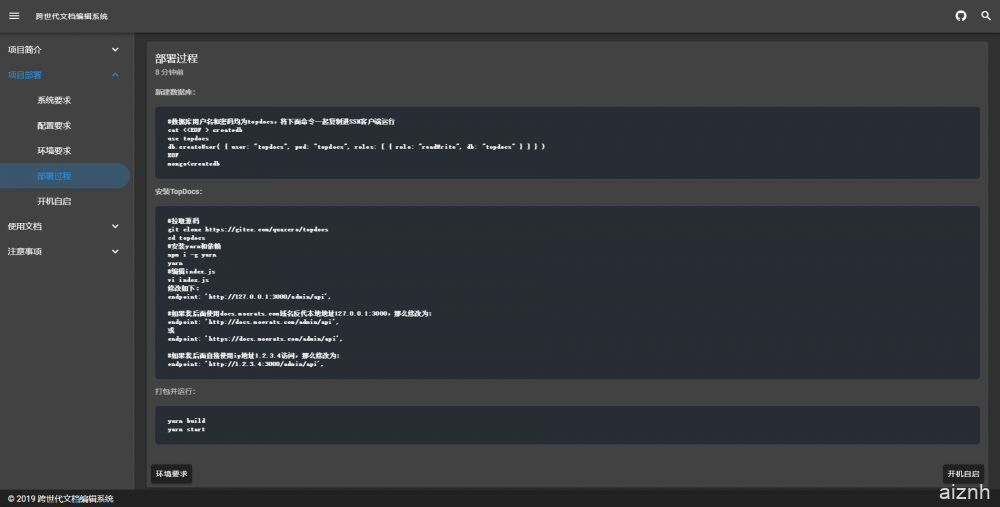
说明:最近博主对文档程序小有需求,找了很久发现都是单页,而且还不支持移动端,不是很理想,所以萌JJ大雕就专门花了半天时间,给博主写了一个,该文档程序基于graphql、nuxtjs、mongodb、keystonejs的实时在线文档编辑系统,可用作各种在线文档编辑和展示,支持markdown语法,对移动端特别友好,这里就开源分享出来,给对文档有需求的人。
截图


安装
Gitee地址:https://gitee.com/quazero/topdocs
所需环境:NodeJS、MongoDB。
1、安装NodeJS
#Debian/Ubuntu系统
curl -sL https://deb.nodesource.com/setup_10.x | bash -
apt install -y git nodejs

#CentOS系统
curl -sL https://rpm.nodesource.com/setup_10.x | bash -
yum install nodejs git -y
2、安装Mongodb
#CentOS 6系统,将下面命令一起复制进SSH客户端运行
cat <<EOF > /etc/yum.repos.d/mongodb.repo
[mongodb-org-4.0]
name=MongoDB Repository
baseurl=https://repo.mongodb.org/yum/redhat/6/mongodb-org/4.0/x86_64/
gpgcheck=1
enabled=1
gpgkey=https://www.mongodb.org/static/pgp/server-4.0.asc
EOF
yum -y install mongodb-org

#CentOS 7系统,将下面命令一起复制进SSH客户端运行
cat <<EOF > /etc/yum.repos.d/mongodb.repo
[mongodb-org-4.0]
name=MongoDB Repository
baseurl=https://repo.mongodb.org/yum/redhat/7/mongodb-org/4.0/x86_64/
gpgcheck=1
enabled=1
gpgkey=https://www.mongodb.org/static/pgp/server-4.0.asc
EOF
yum -y install mongodb-org

#Debian 8系统
apt-key adv --keyserver hkp://keyserver.ubuntu.com:80 --recv 9DA31620334BD75D9DCB49F368818C72E52529D4
echo "deb http://repo.mongodb.org/apt/debian jessie/mongodb-org/4.0 main" | tee /etc/apt/sources.list.d/mongodb-org-4.0.list
apt update -y
apt install -y mongodb-org

#Debian 9系统
curl https://www.mongodb.org/static/pgp/server-4.0.asc | apt-key add -
echo "deb http://repo.mongodb.org/apt/debian stretch/mongodb-org/4.0 main" | tee /etc/apt/sources.list.d/mongodb-org-4.0.list
apt-get update -y
apt-get install -y mongodb-org

#Debian 10系统
curl https://www.mongodb.org/static/pgp/server-4.2.asc | apt-key add -
echo "deb http://repo.mongodb.org/apt/debian buster/mongodb-org/4.2 main" | tee /etc/apt/sources.list.d/mongodb-org-4.2.list
apt update -y
apt install -y mongodb-org

#Ubuntu 16.04系统
apt-key adv --keyserver hkp://keyserver.ubuntu.com:80 --recv 9DA31620334BD75D9DCB49F368818C72E52529D4
echo "deb https://repo.mongodb.org/apt/ubuntu xenial/mongodb-org/4.0 multiverse" | tee /etc/apt/sources.list.d/mongodb-org-4.0.list
apt update -y
apt install -y mongodb-org

#Ubuntu 18.04、18.10、19.04系统
apt-key adv --keyserver hkp://keyserver.ubuntu.com:80 --recv 9DA31620334BD75D9DCB49F368818C72E52529D4
echo "deb https://repo.mongodb.org/apt/ubuntu bionic/mongodb-org/4.0 multiverse" | tee /etc/apt/sources.list.d/mongodb-org-4.0.list
apt update -y
apt install -y mongodb-org
如果导入公匙时出现gnupg, gnupg2 and gnupg1 do not seem to be installed错误,使用apt install -y gnupg2,然后重新导入即可。
启动Mongodb并设置开机自启:
#CentOS 6系统
service mongod start
chkconfig mongod on

#CentOS 7、Debian、Ubuntu系统
systemctl start mongod
systemctl enable mongod
3、新建数据库
#数据库用户名和密码均为topdocs,将下面命令一起复制进SSH客户端运行
cat <<EOF > createdb
use topdocs
db.createUser( { user: "topdocs", pwd: "topdocs", roles: [ { role: "readWrite", db: "topdocs" } ] } )
EOF
mongo<createdb && rm -rf createdb
4、安装TopDocs
#拉取源码
git clone https://gitee.com/quazero/topdocs /opt/topdocs
cd /opt/topdocs
#安装yarn和依赖
npm i -g yarn
yarn
#编辑index.js
vi index.js
修改以下代码:
endpoint: 'http://127.0.0.1:3000/admin/api',

#如果我后面使用docs.moerats.com域名反代本地地址127.0.0.1:3000,那么修改为:
endpoint: 'http://docs.moerats.com/admin/api',
或
endpoint: 'https://docs.moerats.com/admin/api',

#如果我后面直接使用ip地址1.2.3.4访问,那么修改为:
endpoint: 'http://1.2.3.4:3000/admin/api',vi编辑步骤:使用i进入编辑状态,编辑完成使用esc退出编辑状态,再输入:wq,然后Enter确定退出。
开始打包并运行:
yarn build
yarn start

#后台运行
nohup yarn start&
这里访问地址为index.js中修改域名或http://服务器ip:3000。
对于IP访问的,如果CentOS系统打不开的话,可能还需要开启3000端口,使用命令:
#CentOS 6
iptables -I INPUT -p tcp --dport 3000 -j ACCEPT
service iptables save
service iptables restart

#CentOS 7
firewall-cmd --zone=public --add-port=3000/tcp --permanent
firewall-cmd --reload
像阿里云等服务器,还需要去安全组那里开放下端口。
绑定域名
如果你在上面编辑index.js的时候填的域名,那么就需要绑定下域名,反代下http://127.0.0.1:3000即可,反之,使用的ip就不用。
这里依旧使用Caddy,如果你安装过Nginx或者Apache,就自行搜索反代教程了。
安装Caddy:
wget -N --no-check-certificate https://raw.githubusercontent.com/iiiiiii1/doubi/master/caddy_install.sh && chmod +x caddy_install.sh && bash caddy_install.sh
#备用地址
wget -N --no-check-certificate https://www.moerats.com/usr/shell/Caddy/caddy_install.sh && chmod +x caddy_install.sh && bash caddy_install.sh
配置Caddy:
#以下全部内容是一个整体,请修改域名后一起复制到SSH运行!

#http访问,该配置不会自动签发SSL
echo "docs.moerats.com {
 gzip
 proxy / 127.0.0.1:3000 {
    websocket
    header_upstream Host {host}
    header_upstream X-Real-IP {remote}
    header_upstream X-Forwarded-For {remote}
    header_upstream X-Forwarded-Port {server_port}
    header_upstream X-Forwarded-Proto {scheme}
  }
}" > /usr/local/caddy/Caddyfile

#https访问,该配置会自动签发SSL,请提前解析域名到VPS服务器
echo "docs.moerats.com {
 gzip
 tls [email protected]
 proxy / 127.0.0.1:3000 {
    websocket
    header_upstream Host {host}
    header_upstream X-Real-IP {remote}
    header_upstream X-Forwarded-For {remote}
    header_upstream X-Forwarded-Port {server_port}
    header_upstream X-Forwarded-Proto {scheme}
  }
}" > /usr/local/caddy/Caddyfile
tls参数会自动帮你签发ssl证书,如果你要使用自己的ssl,改为tls /root/xx.crt /root/xx.key即可。后面为ssl证书路径。
启动Caddy:
/etc/init.d/caddy start
就可以打开域名进行访问了。
开机自启
这里新建一个简单的Systemd配置文件,只适用于CentOS 7、Debian 8+、Ubuntu 16+等。
#新建systemd配置文件,将以下代码一起复制到SSH运行
cat > /etc/systemd/system/topdocs.service <<EOF
[Unit]
Description=topdocs
After=network.target

[Service]
Type=simple
WorkingDirectory=/opt/topdocs
ExecStart=$(command -v yarn) start
Restart=on-failure

[Install]
WantedBy=multi-user.target
EOF
如果你使用的宝塔,还需要做下软连接,不然启动可能会失败,反之不需要,使用命令:
ln -sf $(which node) /usr/bin/node
开始启动并设置开机自启:
systemctl start topdocs
systemctl enable topdocs
使用教程
后台地址/admin,账号为[email protected],密码为adminadmin,自己进后台修改。
设置中index中是首页的展示内容,需要注意的是:
-logo-/logo.png-logo-
-title-跨世代文档编辑系统-title-
-subtitle-实时动态markdown文档编辑系统,基于graqhql、mongodb、keystonejs、nuxtjs开发的移动优先的服务端渲染文档系统。-subtitle-
-button-查看文档$https://gitee.com/quazero/topdocs-button-
===header===
header下面就是完全的markdown语法的编写区域,编辑完成之后,首页可查看变化。
参数大致意思:
-logo-之间的是LOGO图片,可链接也可路径。
-title-之间的是首页展示大标题。
-subtitle-之间的是首页展示的项目介绍。
-button-是首页展示按钮需要的内容。其中<按钮名>$<链接>,链接可链接也可路径,按需更改。
===header===下面的就是正常的markdown语句,自己根据需要编写。最后如果要上传图片或者文件的话,需要从后台左侧Images处上传并获取地址。
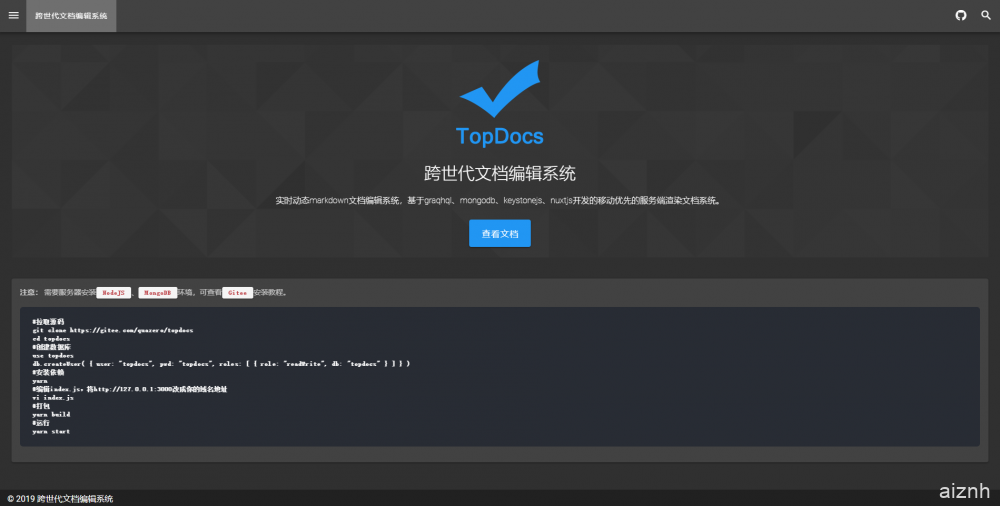
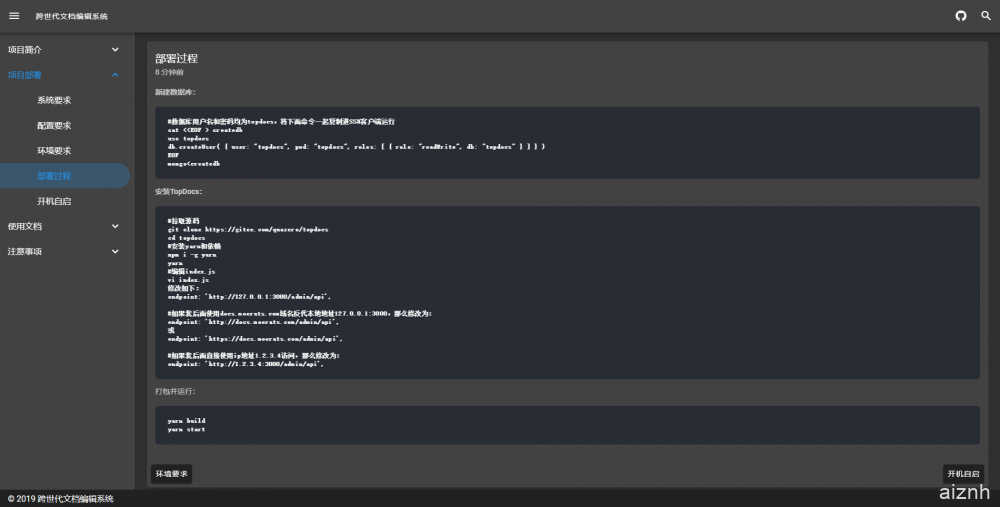
说明:最近博主对文档程序小有需求,找了很久发现都是单页,而且还不支持移动端,不是很理想,所以萌JJ大雕就专门花了半天时间,给博主写了一个,该文档程序基于graphql、nuxtjs、mongodb、keystonejs的实时在线文档编辑系统,可用作各种在线文档编辑和展示,支持markdown语法,对移动端特别友好,这里就开源分享出来,给对文档有需求的人。
截图


安装
Gitee地址:https://gitee.com/quazero/topdocs
所需环境:NodeJS、MongoDB。
1、安装NodeJS
#Debian/Ubuntu系统
curl -sL https://deb.nodesource.com/setup_10.x | bash -
apt install -y git nodejs

#CentOS系统
curl -sL https://rpm.nodesource.com/setup_10.x | bash -
yum install nodejs git -y
2、安装Mongodb
#CentOS 6系统,将下面命令一起复制进SSH客户端运行
cat <<EOF > /etc/yum.repos.d/mongodb.repo
[mongodb-org-4.0]
name=MongoDB Repository
baseurl=https://repo.mongodb.org/yum/redhat/6/mongodb-org/4.0/x86_64/
gpgcheck=1
enabled=1
gpgkey=https://www.mongodb.org/static/pgp/server-4.0.asc
EOF
yum -y install mongodb-org

#CentOS 7系统,将下面命令一起复制进SSH客户端运行
cat <<EOF > /etc/yum.repos.d/mongodb.repo
[mongodb-org-4.0]
name=MongoDB Repository
baseurl=https://repo.mongodb.org/yum/redhat/7/mongodb-org/4.0/x86_64/
gpgcheck=1
enabled=1
gpgkey=https://www.mongodb.org/static/pgp/server-4.0.asc
EOF
yum -y install mongodb-org

#Debian 8系统
apt-key adv --keyserver hkp://keyserver.ubuntu.com:80 --recv 9DA31620334BD75D9DCB49F368818C72E52529D4
echo "deb http://repo.mongodb.org/apt/debian jessie/mongodb-org/4.0 main" | tee /etc/apt/sources.list.d/mongodb-org-4.0.list
apt update -y
apt install -y mongodb-org

#Debian 9系统
curl https://www.mongodb.org/static/pgp/server-4.0.asc | apt-key add -
echo "deb http://repo.mongodb.org/apt/debian stretch/mongodb-org/4.0 main" | tee /etc/apt/sources.list.d/mongodb-org-4.0.list
apt-get update -y
apt-get install -y mongodb-org

#Debian 10系统
curl https://www.mongodb.org/static/pgp/server-4.2.asc | apt-key add -
echo "deb http://repo.mongodb.org/apt/debian buster/mongodb-org/4.2 main" | tee /etc/apt/sources.list.d/mongodb-org-4.2.list
apt update -y
apt install -y mongodb-org

#Ubuntu 16.04系统
apt-key adv --keyserver hkp://keyserver.ubuntu.com:80 --recv 9DA31620334BD75D9DCB49F368818C72E52529D4
echo "deb https://repo.mongodb.org/apt/ubuntu xenial/mongodb-org/4.0 multiverse" | tee /etc/apt/sources.list.d/mongodb-org-4.0.list
apt update -y
apt install -y mongodb-org

#Ubuntu 18.04、18.10、19.04系统
apt-key adv --keyserver hkp://keyserver.ubuntu.com:80 --recv 9DA31620334BD75D9DCB49F368818C72E52529D4
echo "deb https://repo.mongodb.org/apt/ubuntu bionic/mongodb-org/4.0 multiverse" | tee /etc/apt/sources.list.d/mongodb-org-4.0.list
apt update -y
apt install -y mongodb-org
如果导入公匙时出现gnupg, gnupg2 and gnupg1 do not seem to be installed错误,使用apt install -y gnupg2,然后重新导入即可。
启动Mongodb并设置开机自启:
#CentOS 6系统
service mongod start
chkconfig mongod on

#CentOS 7、Debian、Ubuntu系统
systemctl start mongod
systemctl enable mongod
3、新建数据库
#数据库用户名和密码均为topdocs,将下面命令一起复制进SSH客户端运行
cat <<EOF > createdb
use topdocs
db.createUser( { user: "topdocs", pwd: "topdocs", roles: [ { role: "readWrite", db: "topdocs" } ] } )
EOF
mongo<createdb && rm -rf createdb
4、安装TopDocs
#拉取源码
git clone https://gitee.com/quazero/topdocs /opt/topdocs
cd /opt/topdocs
#安装yarn和依赖
npm i -g yarn
yarn
#编辑index.js
vi index.js
修改以下代码:
endpoint: 'http://127.0.0.1:3000/admin/api',

#如果我后面使用docs.moerats.com域名反代本地地址127.0.0.1:3000,那么修改为:
endpoint: 'http://docs.moerats.com/admin/api',
或
endpoint: 'https://docs.moerats.com/admin/api',

#如果我后面直接使用ip地址1.2.3.4访问,那么修改为:
endpoint: 'http://1.2.3.4:3000/admin/api',vi编辑步骤:使用i进入编辑状态,编辑完成使用esc退出编辑状态,再输入:wq,然后Enter确定退出。
开始打包并运行:
yarn build
yarn start

#后台运行
nohup yarn start&
这里访问地址为index.js中修改域名或http://服务器ip:3000。
对于IP访问的,如果CentOS系统打不开的话,可能还需要开启3000端口,使用命令:
#CentOS 6
iptables -I INPUT -p tcp --dport 3000 -j ACCEPT
service iptables save
service iptables restart

#CentOS 7
firewall-cmd --zone=public --add-port=3000/tcp --permanent
firewall-cmd --reload
像阿里云等服务器,还需要去安全组那里开放下端口。
绑定域名
如果你在上面编辑index.js的时候填的域名,那么就需要绑定下域名,反代下http://127.0.0.1:3000即可,反之,使用的ip就不用。
这里依旧使用Caddy,如果你安装过Nginx或者Apache,就自行搜索反代教程了。
安装Caddy:
wget -N --no-check-certificate https://raw.githubusercontent.com/iiiiiii1/doubi/master/caddy_install.sh && chmod +x caddy_install.sh && bash caddy_install.sh
#备用地址
wget -N --no-check-certificate https://www.moerats.com/usr/shell/Caddy/caddy_install.sh && chmod +x caddy_install.sh && bash caddy_install.sh
配置Caddy:
#以下全部内容是一个整体,请修改域名后一起复制到SSH运行!

#http访问,该配置不会自动签发SSL
echo "docs.moerats.com {
 gzip
 proxy / 127.0.0.1:3000 {
    websocket
    header_upstream Host {host}
    header_upstream X-Real-IP {remote}
    header_upstream X-Forwarded-For {remote}
    header_upstream X-Forwarded-Port {server_port}
    header_upstream X-Forwarded-Proto {scheme}
  }
}" > /usr/local/caddy/Caddyfile

#https访问,该配置会自动签发SSL,请提前解析域名到VPS服务器
echo "docs.moerats.com {
 gzip
 tls [email protected]
 proxy / 127.0.0.1:3000 {
    websocket
    header_upstream Host {host}
    header_upstream X-Real-IP {remote}
    header_upstream X-Forwarded-For {remote}
    header_upstream X-Forwarded-Port {server_port}
    header_upstream X-Forwarded-Proto {scheme}
  }
}" > /usr/local/caddy/Caddyfile
tls参数会自动帮你签发ssl证书,如果你要使用自己的ssl,改为tls /root/xx.crt /root/xx.key即可。后面为ssl证书路径。
启动Caddy:
/etc/init.d/caddy start
就可以打开域名进行访问了。
开机自启
这里新建一个简单的Systemd配置文件,只适用于CentOS 7、Debian 8+、Ubuntu 16+等。
#新建systemd配置文件,将以下代码一起复制到SSH运行
cat > /etc/systemd/system/topdocs.service <<EOF
[Unit]
Description=topdocs
After=network.target

[Service]
Type=simple
WorkingDirectory=/opt/topdocs
ExecStart=$(command -v yarn) start
Restart=on-failure

[Install]
WantedBy=multi-user.target
EOF
如果你使用的宝塔,还需要做下软连接,不然启动可能会失败,反之不需要,使用命令:
ln -sf $(which node) /usr/bin/node
开始启动并设置开机自启:
systemctl start topdocs
systemctl enable topdocs
使用教程
后台地址/admin,账号为[email protected],密码为adminadmin,自己进后台修改。
设置中index中是首页的展示内容,需要注意的是:
-logo-/logo.png-logo-
-title-跨世代文档编辑系统-title-
-subtitle-实时动态markdown文档编辑系统,基于graqhql、mongodb、keystonejs、nuxtjs开发的移动优先的服务端渲染文档系统。-subtitle-
-button-查看文档$https://gitee.com/quazero/topdocs-button-
===header===
header下面就是完全的markdown语法的编写区域,编辑完成之后,首页可查看变化。
参数大致意思:
-logo-之间的是LOGO图片,可链接也可路径。
-title-之间的是首页展示大标题。
-subtitle-之间的是首页展示的项目介绍。
-button-是首页展示按钮需要的内容。其中<按钮名>$<链接>,链接可链接也可路径,按需更改。
===header===下面的就是正常的markdown语句,自己根据需要编写。最后如果要上传图片或者文件的话,需要从后台左侧Images处上传并获取地址。
 爱站程序员基地
