记使用AOP+自定义注解完成接口的权限校验,代码如下:
pom文件添加所需依赖:
1 <dependency>2 <groupId>org.aspectj</groupId>3 <artifactId>aspectjrt</artifactId>4 <version>1.8.9</version>5 </dependency>6 <dependency>7 <groupId>org.springframework.boot</groupId>8 <artifactId>spring-boot-starter-aop</artifactId>9 </dependency>
先自定义注解@MyAnnotation,注解中可以设置所需参数:
1 package com.itcq.aop;23 import java.lang.annotation.*;45 //定义注解可以使用的范围6 @Target({ElementType.TYPE, ElementType.METHOD})7 @Retention(RetentionPolicy.RUNTIME)8 @Documented9 public @interface MyAnnotation {1011 String name();12 }
定义解析注解的MyAnnotationService,完成接口权限校验的逻辑,这里我是获取接口请求时header中的user_name参数,进行校验:
1 package com.itcq.aop;23 import lombokad8.extern.slf4j.Slf4j;4 import org.aspectj.lang.ProceedingJoinPoint;5 import org.aspectj.lang.Signature;6 import org.aspectj.lang.annotation.Around;7 import org.aspectj.lang.annotation.Aspect;8 import org.aspectj.lang.annotation.Pointcut;9 import org.springframework.stereotype.Component;10 import org.springframework.web.context.request.RequestContextHolder;11 import org.springframework.web.context.request.ServletRequestAttributes;1213 import javax.servlet.http.HttpServletRequest;1415 @Aspect16 @Component17 @Slf4j18 public class MyAnnotationService {1920 //切入点表达式决定了用注解方式的方法切还是针对某个路径下的所有类和方法进行切,方法必须是返回void类型21 @Pointcut(\"@annotation(com.itcq.aop.MyAnnotation)\")22 private void roleCheckCut() {};2324 //定义了切面的处理逻辑。即方法上加了@MyAnnotation注解,将会进行权限校验25 @Around(\"roleCheckCut()\")26 public Object operateAuth(ProceedingJoinPoint pjp) throws Throwable {2728 //打印日志29 Signature signature = pjp.getSignature();30 String className = pjp.getTarget().getClass().getSimpleName();31 String methodName = signature.getName();32 log.info(\"className:{},methodName:{}\", className, methodName);3334 //获取接口请求时header中的user_name参数,进行校验35 HttpServletRequest request = ((ServletRequestAttributes) RequestContextHolder.getRequestAttributes()).getRequest();36 String userName = request.getHeader(\"user_name\");37 //这里可以Apollo配置可以放行的角色38 if (!\"hwy\".equals(userName)) {39 throw new Exception(userName+\"权限校验不通过\");40 }41 return pjp.proceed();42 }43 }
最后在controller层中编写测试方法,利用postman测试接口:
1 package com.itcq.controller;23 import com.itcq.aop.MyAnnotation;4 import com.itcq.service.TestService;5 import org.springframework.beans.factory.annotation.Autowired;6 import org.springframework.web.bind.annotation.GetMapping;7 import org.springframework.web.bind.annotation.RequestHeader;8 import org.springframework.web.bind.annotation.RequestParam;9 import org.springframework.web.bind.annotation.RestController;1011 @RestCont1b32roller12 public class TestController {1314 @Autowired15 private TestService testService;1617 @GetMapping(\"/test\")18 @MyAnnotation(name = \"HWY\")19 public String testMethod(@RequestHeader(name = \"user_name\") String userName,20 @RequestParam(name = \"user_age\") Integer userAge) {2122 return testService.testMethod(userName, userAge);23 }24 }
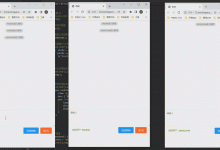
两种不同请求参数的测试结果如下:
参数正确时的返回结果:

参数不正确时的返回结果,接口报错,控制台输出:


可以发现使用AOP+自定义注解的形式完成了接口的权限校验,当然这只算是比较初级的应用,AOP+自定义注解还有很大的探索空间。
 爱站程序员基地


