爱站程序员基地
一个简单的闹钟
- 效果视频
- 闹钟子项
- 子项布局效果图
- 闹钟适配器类
- 闹钟初始数据
- 侧滑删除闹钟子项
- 添加依赖
- 布局设置
- 实现侧滑回调方法
- 绑定RecyclerView
- 删除子项
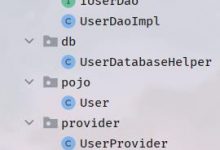
- 序列化实体类
- 自定义TimePicker文字大小及颜色
- Switch效果如图
- 选中状态
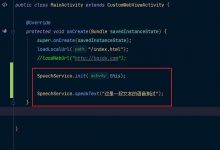
- Service
- SP封装类
效果视频

闹钟子项
子项布局效果图

闹钟适配器类
本示例采用的是RecyclerView,其适配器类与常无二,其异在于继承一个代理类,为适配之后侧滑删除而准备
public class ClockAdapter extends WeSwipeProxyAdapter<ClockAdapter.ViewHolder>
建立一个内部类
ViewHolder实现控件定义申明
public ViewHolder(@NonNull View itemView) {super( itemView );DeleteBtn = itemView.findViewById( R.id.DeleteBtn );Hour = itemView.findViewById( R.id.Hour );Split = itemView.findViewById( R.id.Split );Min = itemView.findViewById( R.id.Min );Layout = itemView.findViewById( R.id.ItemLayout );ClockSwitch = itemView.findViewById( R.id.ClockSwitch );}
实现
onCreateViewHolder
方法载入子项布局文件
public ViewHolder onCreateViewHolder(@NonNull ViewGroup parent, int viewType) {View view = LayoutInflater.from( parent.getContext() ).inflate( R.layout.clock_item,parent,false );return new ViewHolder( view );}
绑定实体类,实现
onBindViewHolder
获取数据
public void onBindViewHolder(@NonNull final ViewHolder holder, final int position) {final ClockTime clockTime = timeList.get( position );holder.Hour.setText( clockTime.getHour() );holder.Split.setText( ":" );holder.Min.setText( clockTime.getMin() );boolean isSelect = clockTime.isSelect();if (isSelect){holder.ClockSwitch.setChecked( true );}else {holder.ClockSwitch.setChecked( false );}holder.DeleteBtn.setOnClickListener( new View.OnClickListener() {@Overridepublic void onClick(View v) {DeleteItem(position);}} );holder.ClockSwitch.setOnCheckedChangeListener( new CompoundButton.OnCheckedChangeListener() {@Overridepublic void onCheckedChanged(CompoundButton buttonView, boolean isChecked) {if (isChecked){SelectModel(holder,clockTime);}else {NormalModel(holder);}}} );}
闹钟初始数据
此处有三处状态,第一种状态:第一次进入程序,默认加载固定闹钟子项;第二种状态:进入添加子项页面,然后返回其主页面,并判断其switch是否为ture,如果为ture则添加子项;第三种状态:程序被系统回收或者用户停止程序,并再次进入程序,防止加载前一时刻闹钟子项;
/*** 默认数据*/private void InitData(){if (flag == START){for (int i = 6; i < 20 ; i+=2) {ClockTime clockTime = new ClockTime( timeFormat.HandleHour( i ),timeFormat.HandleHour( i ),false );clockTimeList.add( clockTime );clockTime.setClockTimeList( clockTimeList );}}else if (flag == PAUSE){GetCallBackData();}else {Log.d( TAG,"Restart App" );}}
侧滑删除闹钟子项
添加依赖
实现侧滑主要依赖于一个第三方包,然后使用RecyclerView进行子项绑定
依赖如下:
implementation 'com.github.WangcWj:WeSwipe:1.0.2'implementation 'cn.wang.we:network:1.0.0'
并在目录build.gradle包下添加如下库
maven { url 'https://jitpack.io' }
布局设置
其实现侧滑删除主要的玄机在于布局文件当中,使用RelativeLayout布局,将删除按钮固定在布局右方,并使用其他布局将其覆盖,只有滑动时,才将其显示。掩盖侧滑删除按钮与暴露侧滑删除按钮效果对比图如下

实现侧滑回调方法
然后,在适配器类中,实现
WeSwipeHelper.SwipeLayoutTypeCallBack
接口,实现如下三个方法,第一个方法为获取侧滑删除按钮的宽度;第二个方法为需要滑动的视图,也就是覆盖侧滑删除按钮的布局;第三个方法为当视图正在滑动时,用户触发单击事件,自动还原滑动状态
float getSwipeWidth();//获取侧滑删除按钮的宽度View needSwipeLayout();View onScreenView();
绑定RecyclerView
最后,在需要添加子项的视图中绑定RecyclerView即可
WeSwipe.attach( mRecyclerView );
删除子项
通过监听子项滑动删除按钮点击事件,实现子项删除
holder.DeleteBtn.setOnClickListener( new View.OnClickListener() {@Overridepublic void onClick(View v) {DeleteItem(position);}} );
private void DeleteItem(int position){timeList.remove( position );notifyDataSetChanged();}
新增闹钟子项
序列化实体类
跳转新增闹钟子项Acticity需要传输实体类对象,传输对象一般需要序列化改类,其操作如下
定义实体类,并实现序列化
public class ClockTime implements Serializable
然后通过
Intent
传输
Bundle
对象
public void Add(View view){flag = 1;Intent intent = new Intent( context,AddClockActivity.class );Bundle bundle = new Bundle( );bundle.putSerializable( "list",(Serializable)clockTimeList );intent.putExtras( bundle );startActivity( intent );}
取出序列化实体类对象
clockTimeList = (List<ClockTime>) getIntent().getSerializableExtra( "list" );
TimePicker
实现时间选择主要使用系统集成的组件
TimePicker
,其使用方法如下
其有两种显示方式,第一种为
spinner
,就是下拉滑动式,第二种为
clock
,即显示一个时钟,通过滑动指针选择时间
<TimePickerandroid:id="@+id/TimePicker"android:layout_width="wrap_content"android:layout_height="wrap_content"android:timePickerMode="spinner"/>
自定义TimePicker文字大小及颜色
在style.xml文件中申明如下样式
<style name="ThemePicker" parent="Theme.AppCompat.Light.NoActionBar"><item name="android:editTextStyle">@style/Widget.Picker.Style</item></style><style name="Widget.Picker.Style" parent="@android:style/Widget.EditText"><item name="android:textColor">@color/colorWhite</item><item name="android:textSize">15sp</item></style>
然后再指定Activcty申明即可
<activityandroid:name=".view.AddClockActivity"android:theme="@style/ThemePicker"></activity><activity
获取时间数据
获取数据比较简单,实现对应接口即可
timePicker.setOnTimeChangedListener( new TimePicker.OnTimeChangedListener() {@Overridepublic void onTimeChanged(TimePicker view, int hourOfDay, int minute) {mHour = hourOfDay;mMin = minute;}} );
返回时间数据
将获取的数据通过
SharedPreferences
存储起来,然后点击存储时,进行页面跳转,然后再该界面进行取出数据
存储数据
sp.PutData( context, "Hour", mHour );sp.PutData( context, "Min", mMin );sp.PutData( context, "isSelect", isSelect );
取出数据
首先判断回调的switch数据是否为ture,如果为ture则保存该子项,然后再适配器类中进行数据添加
boolean access = (Boolean) sp.GetData( context,"access",false );if (access) {int Hour = (int) sp.GetData( context, "Hour", 0 );int Min = (int) sp.GetData( context, "Min", 0 );boolean isSelect = (boolean) sp.GetData( context, "isSelect", false );Log.d( TAG, Hour + "firstHour" );Log.d( TAG, Min + "firstMin" );if (Hour == 0 || Min == 0) {Log.d( TAG, "null" );} else {clockTime = new ClockTime( timeFormat.HandleHour( Hour ), timeFormat.HandleHour( Min ), isSelect );adapter.AddItem( clockTime );}}else {Log.d( TAG,"Cancel Set AlarmClock" );}
子项添加
public void AddItem(ClockTime clockTime){timeList.add( clockTime );notifyDataSetChanged();}
自定义Switch样式
Switch效果如图
选中与默认两种状态效果图如下

创建
thumb
和
track
样式
thumb样式
创建一个选择器文件,有选中和默认两种状态
<selector xmlns:android="http://schemas.android.com/apk/res/android"><item android:state_checked="true" android:drawable="@drawable/open_thumb"/><item android:drawable="@drawable/shut_thumb"/></selector>
选中状态
创新open_thumb.xml文件
<?xml version="1.0" encoding="utf-8"?><shape xmlns:android="http://schemas.android.com/apk/res/android"android:shape="rectangle" ><!-- 高度40 --><size android:height="20dp" android:width="20dp"/><!-- 圆角弧度 20 --><corners android:radius="10dp"/><!-- 变化率 --><gradientandroid:endColor="#eeeeee"android:startColor="#eeeeee" /><stroke android:width="1dp"android:color="#33da33"/></shape>
默认状态
创建shut_thumb.xml文件
<?xml version="1.0" encoding="utf-8"?><shape xmlns:android="http://schemas.android.com/apk/res/android"android:shape="rectangle" ><size android:height="20dp" android:width="20dp"/><!-- 圆角弧度 20 --><corners android:radius="10dp"/><!-- 变化率 --><gradientandroid:endColor="#eeeeee"android:startColor="#eeeeee" /><stroke android:width="1dp"android:color="#666666"/></shape>
track样式
同样创建一个选择器,并用于两种状态
<?xml version="1.0" encoding="utf-8"?><selector xmlns:android="http://schemas.android.com/apk/res/android"><item android:state_checked="true" android:drawable="@drawable/open_track"/><item android:drawable="@drawable/shut_track"/></selector>
选中状态
<?xml version="1.0" encoding="utf-8"?><shape xmlns:android="http://schemas.android.com/apk/res/android"android:shape="rectangle"><!-- 高度30 此处设置宽度无效--><size android:height="20dp"/><!-- 圆角弧度 15 --><corners android:radius="10dp"/><!-- 变化率 定义从左到右的颜色不变 --><gradientandroid:endColor="#2EA803"android:startColor="#2EA803" /></shape>
默认状态
<?xml version="1.0" encoding="utf-8"?><shape xmlns:android="http://schemas.android.com/apk/res/android"android:shape="rectangle"><size android:height="20dp" android:width="20dp"/><corners android:radius="10dp"/><gradient android:startColor="#eeeeee"android:endColor="#eeeeee"/><stroke android:width="1dp"android:color="#666666"/></shape>
闹钟提醒服务
Service
创建一个服务类
其中AlarmManager为系统主要操作类,参数为提醒模式、提醒时间(long型)、PendingIntent对象
以下有三种时间传入,第一种,直接传入一个Long型时间用于测试,第二种,通过设置系统启动至今而设置时间,第三种,通过取出设置的时间,然后获取系统当前时间,将其差传入其中。
public class ClockService extends Service {private Intent intent;private PendingIntent pendingIntent;private AlarmManager alarmManager;private int Hour,Min;private Calendar calendar;@Nullable@Overridepublic IBinder onBind(Intent intent) {return null;}@Overridepublic int onStartCommand(Intent intent, int flags, int startId) {alarmManager = (AlarmManager) getSystemService(ALARM_SERVICE);calendar = Calendar.getInstance();/*** 10秒,用于测试*/long Minutes = 60*1000*60;//long triggerAtTime = SystemClock.elapsedRealtime() + Minutes;//alarmManager.set(AlarmManager.ELAPSED_REALTIME_WAKEUP, triggerAtTime, pendingIntent);/*** 理论*/Hour = intent.getIntExtra("Hour",0);Min = intent.getIntExtra("Min",0);Log.d( TAG,Hour+"ClockServiceHour" );Log.d( TAG,Min+"ClockServiceMin" );calendar.setTimeZone( TimeZone.getTimeZone( "GMT+8:00" ) );calendar.set( Calendar.HOUR_OF_DAY, Hour );calendar.set( Calendar.MINUTE, Min );long clockTime = calendar.getTimeInMillis();long current = System.currentTimeMillis();long time = clockTime - current;Log.d( TAG,clockTime+"Clock" );Log.d( TAG,current+"Current" );Log.d( TAG,time+"Millisecond" );intent = new Intent(this, WarnActivity.class);pendingIntent = PendingIntent.getActivity(this, 0, intent, 0);alarmManager.set(AlarmManager.RTC_WAKEUP, time, pendingIntent);return super.onStartCommand( intent, flags, startId );}@Overridepublic void onDestroy() {super.onDestroy();//alarmManager.cancel(pendingIntent);}}
然后再清单文件中注册服务
<service android:name=".service.ClockService"android:theme="@style/NotTitleBar"/>
开始服务
使用Intent实现服务启动
private void StartService(){Intent intent = new Intent( this, ClockService.class );intent.putExtra( "Hour",mHour );intent.putExtra( "Min",mMin );startService( intent );}
暂停服务
杀死程序
public void Exit(View view){killProcess.finishAll();}
单例类
本示例总共使用到了三个单例类:SP(SharedPreferences封装)、TimeFormat(时间数据格式封装)、KillProcess(杀死所有Activity)
SP封装类
SharedPreferences
KillProcess封装类
KillProcess
TimeFormat封装类
ublic class TimeFormat {private static TimeFormat timeFormat;private TimeFormat(){}public static TimeFormat getInstance(){if (timeFormat == null){sync();}return timeFormat;}private static synchronized void sync(){if (timeFormat == null){timeFormat = new TimeFormat();}}public String HandleHour(int hour){if (hour < 10){return "0"+hour;}else {return String.valueOf( hour );}}public String HandleWeek(int week){String weekday = "";switch (week){case 1:weekday = "星期一";break;case 2:weekday = "星期二";break;case 3:weekday = "星期三";break;case 4:weekday = "星期四";break;case 5:weekday = "星期五";break;case 6:weekday = "星期六";break;case 7:weekday = "星期七";break;}return weekday;}}
下载地址
Gitee下载地址
尾言
目前项目仍存在很多问题,有时间会继续进行迭代